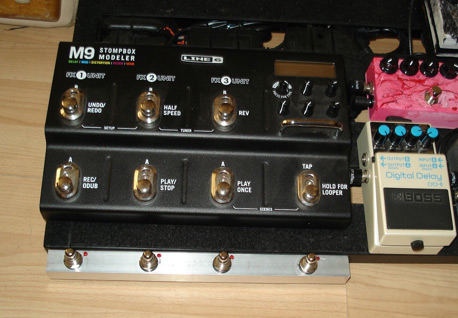
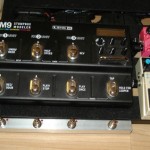
The DL-4 was my go-to looper for many many years. When the M9 came out, I thought it could be the perfect replacement for my trusty DL-4, with nice improvements in the looper (longer time, undo, etc…) and having some high quality effects never hurt anyone either. Unfortunately, because of how the M9 is designed, in order to access the looper, you need to hold a button down to enter the looper. This really kills the “feel” of the pedal for me, as what I really loved about the DL-4 is that I could just step and loop right away, no thinking, no holding……just doing. Thankfully the M9 can take MIDI messages to control the looper.
After finishing The Party Bus sampler/mixer/looper, I began to realize the wonderful power/potential in microcontrollers. I had recently purchased an Arduino and was going through tutorials in order to learn how to program/use it. I though that an Arduino-based M9 MIDI Looper Controller would be a great project as it would let me do what I wanted with the M9, and having a nice guide/walkthrough could help others do the same thing.
The basic idea is to have a very small footprint set of buttons that will function just like a DL-4 looper, that you can access at any time, without having to touch the M9 at all. The only difference in functionality (that is planned at the moment anyways) is for the 4th button sending an UNDO message if you hold it down.
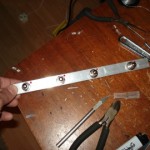
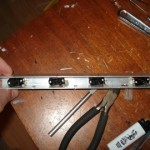
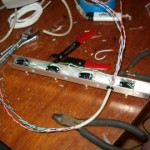
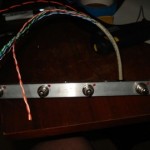
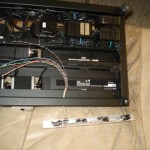
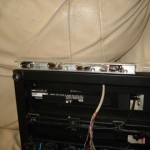
At the moment, this is a work in progress, so all pictures/code are just that. Works in progress. The hardware side of things is pretty much done, unless I feel like adding more LEDs, or completely revamping the idea. With 4 switches, and 4 LEDs, I should be able to program as much control as I need for a very long time (tap, doubletap, hold, twobuttonpress, etc…).
My code is pretty barebones at the moment, with controls over RECORD, OVERDUB, PLAY, STOP and PLAYONCE only working at the time of this pages creation. But the code for the 4th button, which will handle HALFSPEED, REVERSE, and UNDO is nearly done.
Once I have more completed, I will post better pictures, as well as some how-to information covering the hardware and software sides of the project.
For those that are less DIY inclined Disaster Area Amps has made a commercially available version of this (in 2 and 6 button configurations). Check it out.
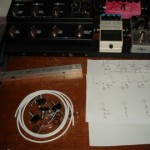
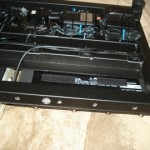
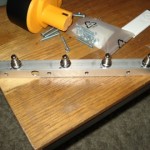
Below are some pictures of the build and the current code.
/*
* M9 MIDI LOOPER CONTROL v1.1 by Rodrigo Constanzo
* 4-Way Button Code by Jeff Saltzman
* 10-04-2010
*
* EXPLANATION
* -----------
* Four momentary footswitches are used to allow access to the Line 6 M9 looper remotely via MIDI.
* Buttons 1-3 function exactly as the first three buttons on the DL4 looper. Button 4 has three
* functions it controls. Single tap to go into half-speed mode. Double tap to go into reverse mode
* and press/hold to activate the UNDO/REDO function.
*
*/

/* TO DO
* add LED control
* button3 turns off LED2
* playonce button held down = retrigger/stutter?
* OR keep track of loop duration, and use it for LED3 (remember halfspeed!)
*/

#include// MIDI library

// ======= SWITCHES
Button button1 = Button(8,PULLDOWN); // record/overdub
Button button2 = Button(9,PULLDOWN); // play/stop
Button button3 = Button(10,PULLDOWN); // play once
#define buttonPin 11 // halfspeed/reverse/undo button

// ======= LEDS
#define LED 13 // onboard LED for button press status
#define LED1 3 // record/overdub status
#define LED2 4 // play/stop status
#define LED3 5 // play once status
#define ledPin1 5 // half-speed loop status
#define ledPin2 6 // reverse status
#define ledPin3 15 // unused
#define ledPin4 14 // unused

// ======= LED variables
boolean ledVal1 = false; // state of halfspeed LED
boolean ledVal2 = false; // state of reverse LED
boolean ledVal3 = false; // unused
boolean ledVal4 = false; // unused

// ======= STATE variables
int state = 0; // state of stop(0),play(1),record(2),overdub(3)

// ======= TIMING variables
int debounce = 5; // ms debounce for halfspeed/reverse
int DCgap = 250; // max ms between clicks for a double click event
int holdTime = 700; // ms hold period: how long to wait for press+hold event

//=================================================

void setup() {

pinMode(buttonPin, INPUT); // halfspeed/reverse/undo
digitalWrite(buttonPin, HIGH );
pinMode(LED,OUTPUT); // button press LED status
pinMode(LED1, OUTPUT); // record/overdub LED
pinMode(LED2, OUTPUT); // play/stop LED
pinMode(LED3, OUTPUT); // play once LED
pinMode(ledPin1, OUTPUT); // halfspeed
pinMode(ledPin2, OUTPUT); // reverse
pinMode(ledPin3, OUTPUT); // unused
pinMode(ledPin4, OUTPUT); // unused
digitalWrite(LED1, LOW);
digitalWrite(LED2, LOW);
digitalWrite(LED3, LOW);
digitalWrite(ledPin1, LOW); // digitalWrite(ledPin1, ledVal1);
digitalWrite(ledPin2, LOW); // digitalWrite(ledPin2, ledVal2);
digitalWrite(ledPin3, LOW); // digitalWrite(ledPin3, ledVal3);
digitalWrite(ledPin4, LOW); // digitalWrite(ledPin4, ledVal4);

// ======= MIDI
Serial.begin(31250);
}

void loop(){

// ======= BUTTON1
if (button1.uniquePress()){
// ======= RECORD NEW LOOP ////
if(state == 0){
state = 2;
Record();
}
// ======= OVERDUB (FROM RECORD STATE) ////
else if(state == 2){
state = 3;
Overdub();
}
// ======= OVERDUB (TO PLAY STATE)
else if(state == 3){
state = 1;
Overdub();
}
// ======= RECORD (TO PLAY STATE)
else if(state == 2){
state = 1;
Play();
}
// ======= OVERDUB (FROM PLAY STATE)
else if(state == 1){
state = 3;
Overdub();
}
}

// ======= BUTTON2
if (button2.uniquePress()){
// ======= PLAY
if(state == 0){
state = 1;
Play();
}
// ======= STOP
else if(state == 1){
state = 0;
Stop();
}
}

// ======= BUTTON3
if(button3.uniquePress()){
state = 0;
PlayOnce();
}

// ======= BUTTON4
int b = checkButton(); // halfspeed/reverse/undo button press

// ======= HALFSPEED/REVERSE/UNDO
if (b == 1) clickEvent();
if (b == 2) doubleClickEvent();
if (b == 3) holdEvent();

}

//=================================================

// Events to trigger by click, double-click, and press+hold
void clickEvent() {
ledVal1 = !ledVal1;
digitalWrite(ledPin1, ledVal1);
HalfSpeed();
}

void doubleClickEvent() {
ledVal2 = !ledVal2;
digitalWrite(ledPin2, ledVal2);
Reverse();
}

void holdEvent() {
ledVal3 = !ledVal3;
digitalWrite(ledPin3, ledVal3);
Undo();
}

//void longHoldEvent() {
//ledVal4 = !ledVal4;
//digitalWrite(ledPin4, ledVal4);
//}

//=================================================
//============== GUTS BEYOND HERE =================
//============== DO NOT MESS WITH =================
//=================================================

// ======= MIDI Messages To Send

void Record() {
Serial.print(0xb0,BYTE);
Serial.print(50,BYTE);
Serial.print(127,BYTE);
digitalWrite(LED,HIGH);
digitalWrite(LED,LOW);
}

void Overdub() {
Serial.print(0xb0,BYTE);
Serial.print(50,BYTE);
Serial.print(0,BYTE);
digitalWrite(LED,HIGH);
digitalWrite(LED,LOW);
}

void Play() {
Serial.print(0xb0,BYTE);
Serial.print(28,BYTE);
Serial.print(127,BYTE);
digitalWrite(LED,HIGH);
digitalWrite(LED,LOW);
}

void Stop() {
Serial.print(0xb0,BYTE);
Serial.print(28,BYTE);
Serial.print(0,BYTE);
digitalWrite(LED,HIGH);
digitalWrite(LED,LOW);
}

void PlayOnce() {
Serial.print(0xb0,BYTE);
Serial.print(80,BYTE);
Serial.print(127,BYTE);
digitalWrite(LED,HIGH);
digitalWrite(LED,LOW);
}

void HalfSpeed() {
Serial.print(0xb0,BYTE);
Serial.print(36,BYTE);
Serial.print(127,BYTE);
digitalWrite(LED,HIGH);
digitalWrite(LED,LOW);
}

void Reverse() {
Serial.print(0xb0,BYTE);
Serial.print(85,BYTE);
Serial.print(127,BYTE);
digitalWrite(LED,HIGH);
digitalWrite(LED,LOW);
}

void Undo() {
Serial.print(0xb0,BYTE);
Serial.print(82,BYTE);
Serial.print(127,BYTE);
digitalWrite(LED,HIGH);
digitalWrite(LED,LOW);
}

// ======= Timing guts for 4-way button

// Button timing variables
int longHoldTime = 5000; // ms long hold period: how long to wait for press+hold event (not used)

// Other button variables
boolean buttonVal = HIGH; // value read from button
boolean buttonLast = HIGH; // buffered value of the button's previous state
boolean DCwaiting = false; // whether we're waiting for a double click (down)
boolean DConUp = false; // whether to register a double click on next release, or whether to wait and click
boolean singleOK = true; // whether it's OK to do a single click
long downTime = -1; // time the button was pressed down
long upTime = -1; // time the button was released
boolean ignoreUp = false; // whether to ignore the button release because the click+hold was triggered
boolean waitForUp = false; // when held, whether to wait for the up event
boolean holdEventPast = false; // whether or not the hold event happened already
boolean longHoldEventPast = false;// whether or not the long hold event happened already

int checkButton()
{
int event = 0;
// Read the state of the button
buttonVal = digitalRead(buttonPin);
// Button pressed down
if (buttonVal == LOW && buttonLast == HIGH && (millis() - upTime) > debounce) {
downTime = millis();
ignoreUp = false;
waitForUp = false;
singleOK = true;
holdEventPast = false;
longHoldEventPast = false;
if ((millis()-upTime) < DCgap && DConUp == false && DCwaiting == true) DConUp = true; else DConUp = false; DCwaiting = false; } // Button released else if (buttonVal == HIGH && buttonLast == LOW && (millis() - downTime) > debounce) {
if (not ignoreUp) {
upTime = millis();
if (DConUp == false) DCwaiting = true;
else {
event = 2;
DConUp = false;
DCwaiting = false;
singleOK = false;
}
}
}
// Test for normal click event: DCgap expired
if ( buttonVal == HIGH && (millis()-upTime) >= DCgap && DCwaiting == true && DConUp == false && singleOK == true) {
event = 1;
DCwaiting = false;
}
// Test for hold
if (buttonVal == LOW && (millis() - downTime) >= holdTime) {
// Trigger "normal" hold
if (not holdEventPast) {
event = 3;
waitForUp = true;
ignoreUp = true;
DConUp = false;
DCwaiting = false;
//downTime = millis();
holdEventPast = true;
}
// Trigger "long" hold
if ((millis() - downTime) >= longHoldTime) {
if (not longHoldEventPast) {
event = 4;
longHoldEventPast = true;
}
}
}
buttonLast = buttonVal;
return event;
}



Rich from Line 6 here. I love how you made this all work together. Very cool. Love Pedaltrain as well.
I just wanted to say one thing for guys who love the DL4 Looper and by the M9 just for Looper. You CAN actually use it just like the DL4 by putting on one Delay you like and then putting it into looper mode and leaving it. That makes it just like the DL4 for the entire time it is on. You can kill the delay just like on the DL4 because you will have control over the one delay only that you get with DL4.
So to clarify, if you want instant control over the looper AND control over many FX at the same time, this is a great way to go.
Hi I was wondering if you had managed to complete the code for the loop controller yet?
No, I sold off my M9 and have moved onto straight laptop stuff for looping etc…
Do check out Disaster Area stuff.
This is exactly what I’m looking to buy. If Line6 offered a switch like this, I’d pay good money to have the M9 Looper functions right at my feet. Unfortunately, I am not the DIY kind and wouldn’t be able to build something like this. Great work, mate!
Hola!
Antes de todo gran trabajo!! Estoy intentando hacer algo similar y al compilar tu programa para ver el funcionamiento me da el siguiente error.
“In file included from /Users/pab/Documents/Arduino/pedal looper/sketch_jun07a/sketch_jun07a.ino:2:0:
/Users/pab/Documents/Arduino/libraries/Button/Button.h:23:22: fatal error: WProgram.h: No such file or directory
#include “WProgram.h”
^
compilation terminated.
exit status 1
Error compilación en tarjeta Arduino/Genuino Uno.”
Hay que decir que tuve que instalar la librería “button” porque hay funciones que la requieren creo yo. Por ejemplo: uniquePress
Si sabes que puede ser lo agradecería enormemente.
Un saludo,
Pablo
Hmm, it could be because of a change in the Arduino libraries. The original code for this is quite old, possibly before even the Arduino 1.0 standard. Wouldn’t really know where to start in updating this though, as my level of Arduino syntax/library changes isn’t too great.
Let me know if you figure it out though, so I can update this page.