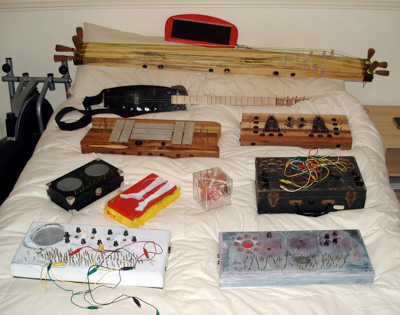
I first came across experimental musical instruments after seeing the EMI book “Gravikords, Whirlies, and Pyrophones” at the local book shop. Little did I know how much an affect on my life that book/CD would have. Having already been into unusual sounds and experimental music, logic only dictated that to further explore new sounds, new instruments would be needed. I first began by modifying toys in a process called circuit-bending. This later led on to electro-acoustic and acoustic creations. On this page you can find some of the instruments I’ve made over the years.
ELECTRO-ACOUSTIC
Specto-Situationalist
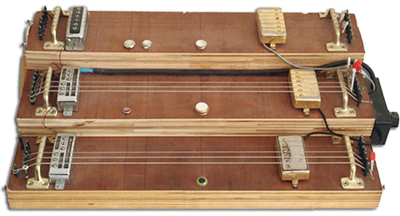
The Specto-Situationalist is one of my first ‘from scratch’ instruments. The ‘Specto‘ is basically three stripped down guitars, that are staggered to facilitate percussive playing. To that end, it has been part of my drum setup for several years now. It’s made from 3/4″ furniture grade ply-wood, brass door handles, zither pins, and spare guitar pickups.
The Specto is generally played with drumsticks, either by striking the strings, ‘bowing’ the strings, or ‘fretting’ the strings.
The original design was a lot more intricate. It was going to have all sorts of electronics inside of it, including a bent RadioShack reverb, and other miscellaneous electronics, but routing out the body proved to be more difficult than was possible with the tools I had at the time. It originally had only the gold pickups on the right, but I added the second set of pickups in 2005.
Click here for more information on the Specto.
Specty
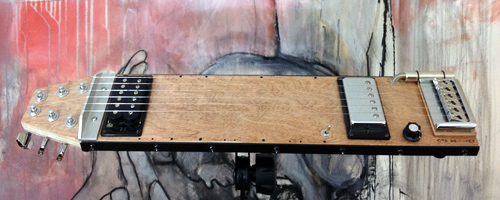 The Specty is the more compact, portable sibling of my larger Specto instrument. The original was built many years ago, and although I still love and use it today, it’s size and weight made it impractical for taking around to rehearsals/gigs. I’ve also been trying to downsize my setup as to make it easier to gig internationally. There is no way I’d be able to take the full sized Specto on a flight. The Specty on the other hand fits in a carry-on suitcase.
Click here for more info/pics/videos of the Specty.
Sidrassi-Tom
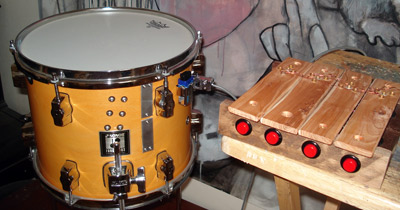 The Sidrassi-Tom is one of my latest builds. I’ve owned the Sidrassi for several years now, but because of its size, I don’t use it unless It’s in a setup that revolves around it. I had experimented with mounting piezo pickups inside drums before, but I had to sell my modified drums when moving to the UK. The idea is fairly simple. The Sidrassi uses piezos under the metal bars to detect pressure. I’m just connecting some more piezos to it. I’ve mounted four piezos on my floor tom. At first I used piezo film from EMI but when using a buffer with them, they were too weak to drive the Sidrassi at a usable volume. I found that plain piezo discs worked the best, but I couldn’t find any that were small enough to not have a huge effect on the acoustic sound of the tom. I finally sourced some 12mm discs that fit the bill perfectly.
Click here for more information on the Sidrassi-Tom.
Electric Whisks
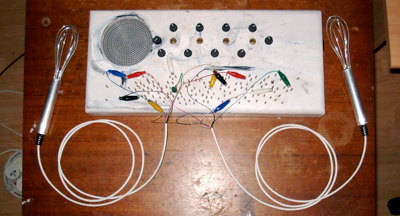
The Electric Whisk is something that I’ve had in the back of my mind for years. The idea is simple, having a multi-pronged whisk where each prong is connected to an alligator clip on the other side. Simple idea, but not so simple to make. All commercial whisks have metal connecting every prong, so I had to build one from scratch, in such a way that the prongs don’t touch each other at all.
Click here for more information on the Electric Whisks.
ELECTRONIC
Circuit-Bending
CIrcuit-Bending is where I got my start. I don’t do quite as much bending as I used to, but bent instruments do represent a big part of my sound world, particularly when it comes to improvisation.
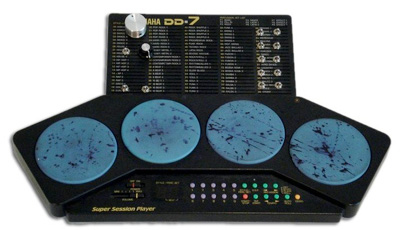
The bulk of my circuit-bent instruments are keyboards, but I have recently taken a liking to drum machines (my two most recent toy bends are Yamaha drum machines).
Click here for more info on my bent instruments.
The Grassi Box
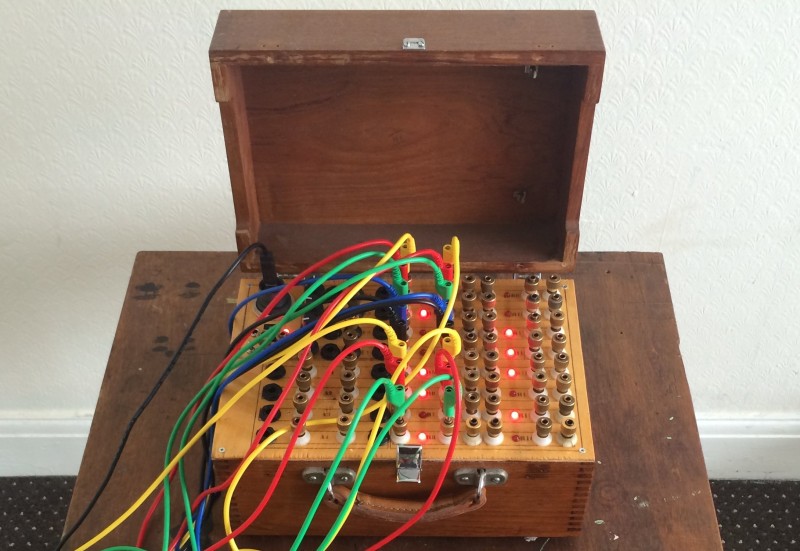
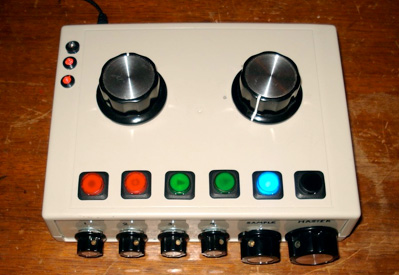
The Grassi Box is a MIDI-to-relay piece of hardware (built by Dan Wilson of Circitfied) based on an Arduino teensy and some accompanying software tools built in Max. The idea is to be able to control a variety of my ciat-lonbarde instruments from a computer.
Click here for more info on the Grassi Box
The Party Bus
The Party Bus is something I put together for my ‘drums’ setup which both streamlined and expanded my setup. It contains two circuits. The first a 4 to 1 buffered mixer which replaces my passive DOD mixer, and more excitingly, a Where’s The Party At 8-bit Bendable Sampler.
Click here for more info on the Party Bus.
Ciat-Lonbarde
I first came across Peter Blasser’s instruments many years ago, and fell in love immediately. Unfortunately I wasn’t able to own any for another couple of years as he was only doing individual eBay auctions at the time, and they were out of my price range. It was the kitten-nettik kits that started it for me. I bought one, built it, fell in love some more, and never looked back. I’ve amassed quite a collection of his instruments, and I think I can comfortably say that I have the biggest collection of his instruments in Europe.
Click here to see more info on my Ciat-Lonbarde instruments.
Guitar Pedalboard
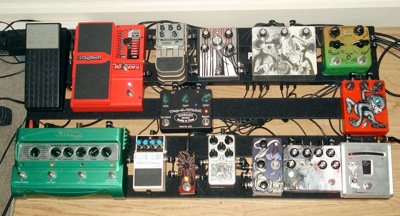
My guitar pedalboard has become a DIY/mod haven with the bulk of my pedals being modded in some form or another. As evident from the picture, this is still a work in progress. I’m currently finishing up a circuit-bent pitch pedal, and have plans for a few other goodies.
Click here to see more info on my pedalboard.
Digital Whammy Mod
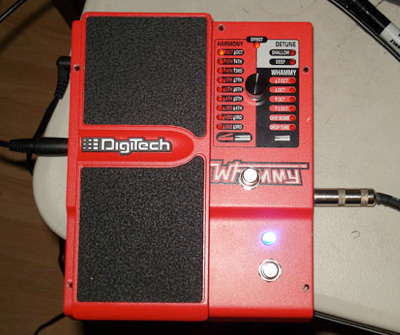 After giving up on trying to buy an original Digitech WH-1, I decided to buy a current model WH-4 instead. Liking the sounds of it, but not the terrible bypass it had, I wondered if it could be modified to true-bypass like the older, and rarer WH-1. After opening it up, things looked promising. I set out to make it happen.
I ordered parts to true-bypass it, and to add a momentary switch, since I was using it for short hits most of the time. The modification was a lot easier than I had anticipated, although it did take me several hours, which including all the necessary circuit tracing. Knowing what to do, I’m sure the mod can happen in less than an hour.
Click here for a complete photo walk-through, guide, explanation, including video clips.
Arduino
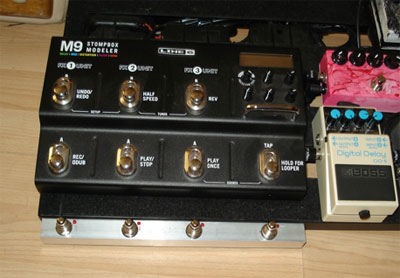 This is my Arduino-based M9 MIDI Looper. When the M9 came out I decided I would replace my trusty DL4, but needing to hold the pedal in order to enter the looper was no good. Click here to find out more about this build.
ACOUSTIC
Handmade Cymbal
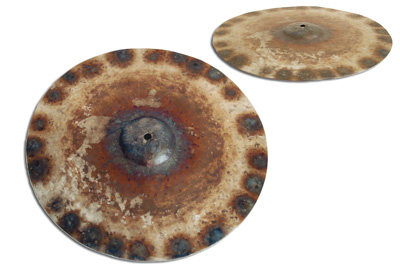
I first got the idea to make a hand-made cymbal from seeing an article on Steve Hubback in an american drum magazine. I bought his book ‘Fire and Steel’ and, after reading it, decided that I wanted to try making my own cymbal. In the book he mentions 316L Stainless Steel being his metal of choice, so I decided to start there.
I purchased a couple of ball peen hammers, one heavy, one light. The lighter one is what I mainly made the cymbal with, as you have much more control over it. For my anvil, I used two large tree trunks, a round one for most of the work, and an irregularly shaped one for the bell/edge work.
It took several months of casual/weekend work to get something that remotely looked like a cymbal. Once I was satisfied (read: could do no more) I heated the cymbal with a hand torch. This was quite ineffective, and is responsible for the uneven color the cymbal now has.
I plan on finishing the cymbal properly. I’m trying to find a metalwork shop that has a lathe and would allow me use of it to remove some mass from the cymbal. After that, and probably before as well, the cymbal will be re-hammered into a more even shape.
The cymbal currently sounds like a very, very dry ride, combined with gongy overtones. It sounds very interesting with a contact mic on it.
Snare/Violin
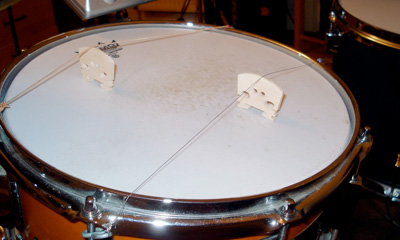 The Snare/Violin idea came from seeing some Chris Corsano videos online. For mine, I made two lengths of guitar string (one thin, one thick), with hooks on the end, so I can remove them when not in use. The bridges are regular violin bridges that I can just slide in, and move to alter the pitch. The strings sound great plucked, struck, and bowed. Takes some setup time, but it’s a great addition to the kit. A close friend, Linda Jankowska, has recently take the idea further than I did.
Friction Mallets
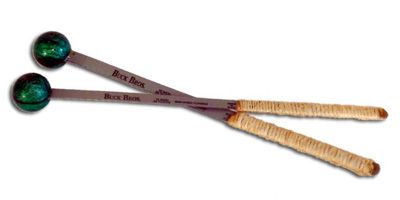
I hand-made some Friction Mallets to expand my drumstick collection. A friction mallet is a super-ball epoxied onto the end of a flexible stick. When dragged across a surface, such as a drum head, it can coax long sustained sounds out of it. For the handles I used hacksaw blades, which I ground the teeth off of. I wrapped the lower half with twine, and epoxied it in place. The hacksaw blades can be both flexible, or stable, depending on how you hold them.
Since this photo I’ve replaced the balls with some better ones. The ones on it now have a matt finish, and grab on to cymbals much better.
Pot Lids
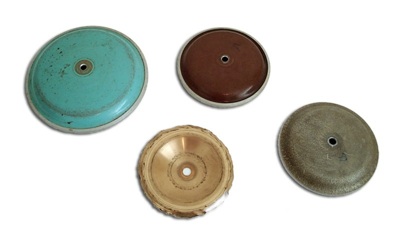 Drum set Potlids, and Reworked Cymbal Bell. The potlids were found at a local Goodwill(charity shop). The handles were unscrewed, and the holes were enlarged to allow drum set mounting. The cymbal bell is an old broken cymbal, that was trimmed, and bent into its current shape. The pot lids offer clear, fairly dry pitches with moderate sustain, and the bell offers trashy , clangy nonsense.


