


Ambisonic feedback experiments
In late 2023 I had the idea to expand the kind of feedback-based playing I was doing with pieces like Kaizo Snare by having some kind of robotic microphone arm holding an additional microphone that would be controlled by the computer while I was doing other things. Like some kind of 3rd arm thing.
Well after much experimenting and testing I’ve gotten it up and running and it looks/sounds something like this:
(more performance videos below)
///////////////////////////////////////////////////////////////////////////////////////////////////////////////////////////////////////////////////////////////////////
Table of Contents
Background
Initial Experiments
Ambi-Alice DIY microphone
Recent Experiments
Musical Performances
The Future
///////////////////////////////////////////////////////////////////////////////////////////////////////////////////////////////////////////////////////////////////////
Background
My original sketch on the lines forum post was this:
I suppose at the time I was thinking about movements across a flat plane, similar to how a pen plotter or 3d-printer work, where the mic would remain stationary in the Z (vertical) axis and be moved around within that top-left quadrant of the drum.
That led me down an exciting, but very short-lived rabbit hole once I saw the prices (and heard the sound), of 3-axis miniature robotics.
As much as I would love to have a proper surrogate arm moving around, helping me conjure feedback demons , the motor noise and insane costs are prohibitive.
So the idea went on the back burner for some months. When revisiting the idea I thought to myself, “isn’t changing the position of a microphone in post a thing”? It turns out it is.
Enter the world of ambisonics. (good primer from RODE here)
Ambisonics is a deep and complex world, most of which revolves around the idea of capturing and encoding the spatial information of a location and playing it back on a system intended to do so. This is pretty interesting in and of itself, but I was more interested in the aspect of ambisonics that dealt with dynamically changing the position, direction, and polar pattern of a microphone.
It was tricky for me to find more information on this online, though I did find an interesting Benn Jordan video where he talks about moving the microphone position in post-production which seemed promising (timestamp).
Sadly for me, I did not have nor know anyone who owned an ambisonic microphone to test with. And given that the price tag generally starts around ($|£|€)1000, I wasn’t about to buy one on a weird hunch.
So I reached out to a friend, who is also a big feedback enjoyer (Scott McLaughlin), to see if his institution had an ambisonic microphone, and it turns out they did!
We booked a day to experiment to see if this idea of using ambisonics to dynamically effect audio feedback was even viable.
///////////////////////////////////////////////////////////////////////////////////////////////////////////////////////////////////////////////////////////////////////
Initial Experiments
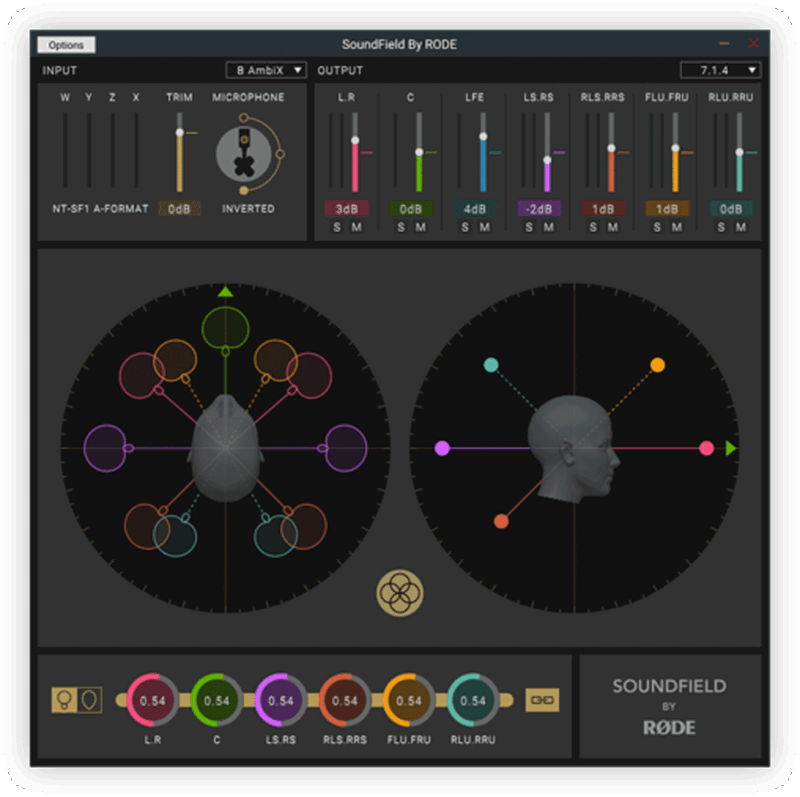
Our initial experiments used a SoundField ST250 microphone running into RODE’s SoundField plugin (mainly designed to work with their NT-SF1 microphone) to decode and do all the beamforming stuff. This is not ideal as most ambisonic microphones have calibration filters that are bespoke to their geometry and frequency response, but the SoundField plugin had an easy to understand interface and could let us just see if this idea was viable at all.
After some troubleshooting and setup, the initial tests seemed promising. We explored orienting the microphone in a room both physically and ambisonic-ally, and then how it behaved next to a snare drum with its own resonant modes. We were able to shape and nudge the feedback in the system by using the beamforming, and although it was not very “fast”, it was effective and more importantly, interesting. We even went as far as exploring four independent feedback signal patches by sending virtual quad outputs to four speakers in the room. With how chaotic and unstable a single feedback system is, it was much more difficult to control four interlocking feedback signals in a meaningful way, but as with the vanilla testing, adjusting the parameters in the plugin did produce musical results.
We did find that there were occasionally undesirable filter-y and phase-y artifacts, particularly at extreme gain settings, but it was hard to know if this was intrinsic to using ambisonics for feedback or more due to the fact that we were using incorrect calibration filters for the microphone we were using (by using the RODE plugin).
Signal processing-wise we tried a patch nearly identical to what I used in Kaizo Snare where I had a steep high-pass filter around 120Hz (to remove very “sticky” low room modes) and then into some saturation (Dirt from the confetti M4L devices). I initially put the filter and saturation before the SoundField plugin inputs (basically on the raw microphone output), initially thinking that since it was a feedback system, the placement didn’t matter very much. In retrospect this was not a good idea as this likely impacted the decoding and beamforming we were after (more on this below), but it did work as a proof of concept.
Although we didn’t record any audio or video that day, Scott did film a quick example shortly after using the same mic and location (though not going through same processing we did initially). This gives you a rough idea of what the initial tests were like:
///////////////////////////////////////////////////////////////////////////////////////////////////////////////////////////////////////////////////////////////////////
Ambi-Alice DIY microphone
I had previously seem some of South Sleuth’s great YouTube videos, including one on his Ambi-Alice microphone.
This seemed like a viable first step to having a microphone that wasn’t going to break the bank.
Since I was based in the UK/EU, sourcing some of the parts was slightly less straight forward, but talking to Scott and another feedback aficionado friend (Richard Knight) we decided to go in on a group buy of the parts.
I’ve done quite a bit with 3d printing, but exclusively with FDM printers. Given the small parts and tight tolerances of the Ambi-Alice, the build requires resin printing. Thankfully Scott had access to a resin printer at his job, so he printed all of us the required parts.
As it turns out, the small parts were quite fragile, and less dimensionally stable than what I was used to, and trying to assemble one of the mics ended up cracking or breaking the delicate parts. This could be down to the resin and settings used, but without a resin printer of my own, it was difficult to print off more parts.
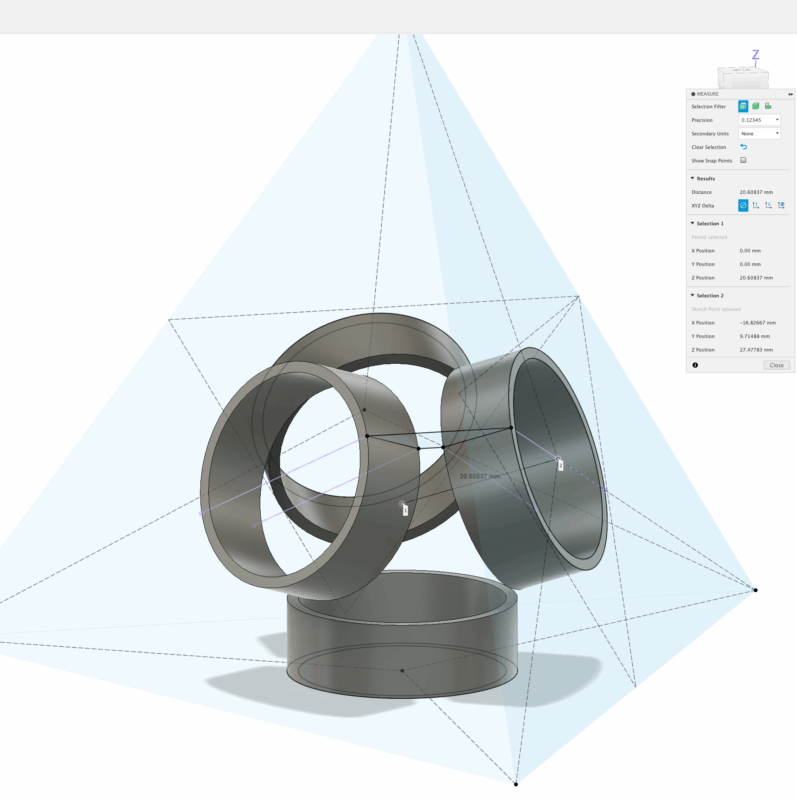
As I had recently upgraded to a Prusa mk4, I was I wondering if it would be possible to print the parts on an FDM printer. Thankfully the Ambi-Alice instructables page did have the STL files so I was able to download them and slice them for my printer. My initial attempts were not promising as the capsule holder was very round and had few flat surfaces to even orient the part on the build plate. Given the geometry of the parts with lots of circles and flat planes, I wondered if I could tweak the design slightly to make it more friendly for FDM printing, but it had been my experience that it was very difficult to modify STL files, particularly in Fusion 360, the CAD software I was comfortable with.
I emailed Jules (Sound Sleuth) and he put me in touch with the person who created the design files for the Ambi-Alice (Tom Benedict). It turns out the mic was designed in Rhino, and therefore a completely different design paradigm to Fusion, so I wasn’t able to work from the original files. After a bit of back and forth nailing down critical dimensions, I redesigned the part in Fusion with ease of printing in mind, which led to this:
Although this capsule basket looks very similar to the original, it had a lot more flat surfaces, chunkier intersections and cable holders, and chamfers instead of filet everywhere. It was also able to be printed without support material!
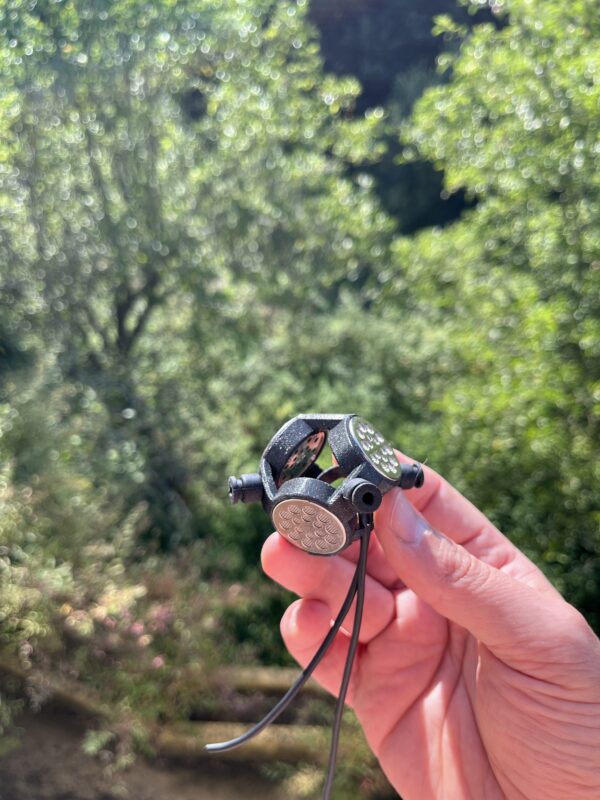
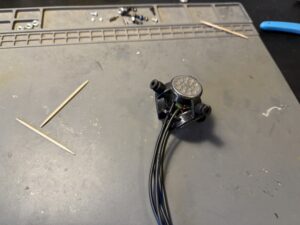
The rest of the parts were, more-or-less, able to be printed as is, with slow and careful printing, and even slower and more careful support removal. That led me to having a completely FDM-printed Ambi-Alice microphone:
-
- capsule assembly
-
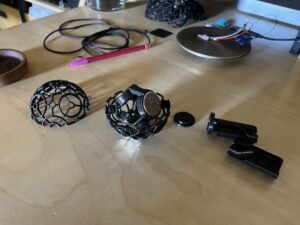
- all parts printed
-

- assembled microphone
-
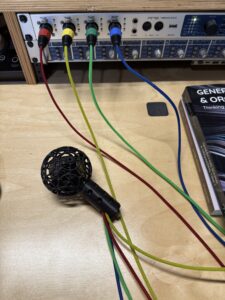
- microphone plugged in
Here are the STL files if you would like to print your own on an FDM machine, with the rest of the instructions on South Sleuth’s instructables post.
///////////////////////////////////////////////////////////////////////////////////////////////////////////////////////////////////////////////////////////////////////
Recent Experiments
Now when I first plugged in the Ambi-Alice to test the feedback, my results were incredibly disappointing. The sound was phase-y and washy, and although it did feedback, it was not terribly musical or interesting. At this point I wasn’t sure if the DIY mic quality was to blame or if it was the fact that the mic required proper calibration for the decoding to work properly. The Ambi-Alice isntructables does include calibration files, though these are intended to be loaded into VVEncode, a paid ambisonics plugin that I did not want to take on as a dependency. The microphone sat untouched for a few months.
After working on some other projects I decided it was worth giving it a more earnest test again. I plugged the Ambi-Alice in and got the same washy/phase-y feedback that I was getting before. I then started tweaking the settings some more and found that having the polar pattern set to full omni works terribly in this context. Once I pulled the polar pattern in, I started getting much more reasonable and pleasant results. I then experimented with the signal path and moved the high-pass filter and saturation to after the SoundField plugin, meaning that the audio coming into the the decoding process was direct from the capsules. Turns out this works much better for the beamforming, and this makes sense. Any additional filtering and saturation I was adding before decoding would just blur or otherwise distort the crazy maths involved in the process.
Once I had made these adjustments, I was able to start exploring the feedback in a more creative way.
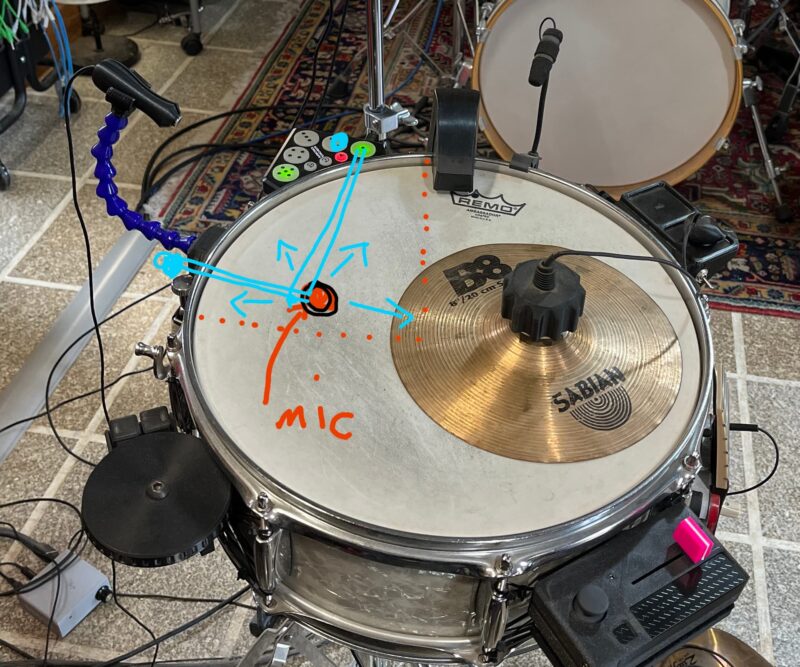
The next thing I started experimenting with was the physical location of the microphone. In the initial tests with Scott we primarily explored microphone positions near the head of the drum, as I had found this works well for exciting room modes and modes of the drum head itself. And you can get quite detailed and nuanced with modulating the drum modes by placing and moving objects on the head.
Here are some of my first experiments with this kind of room/head mode modulation with objects from some years ago:
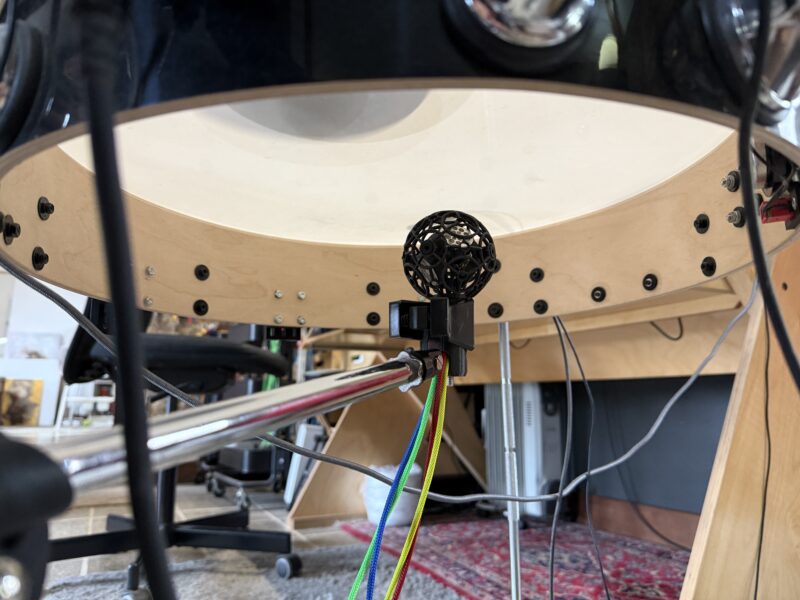
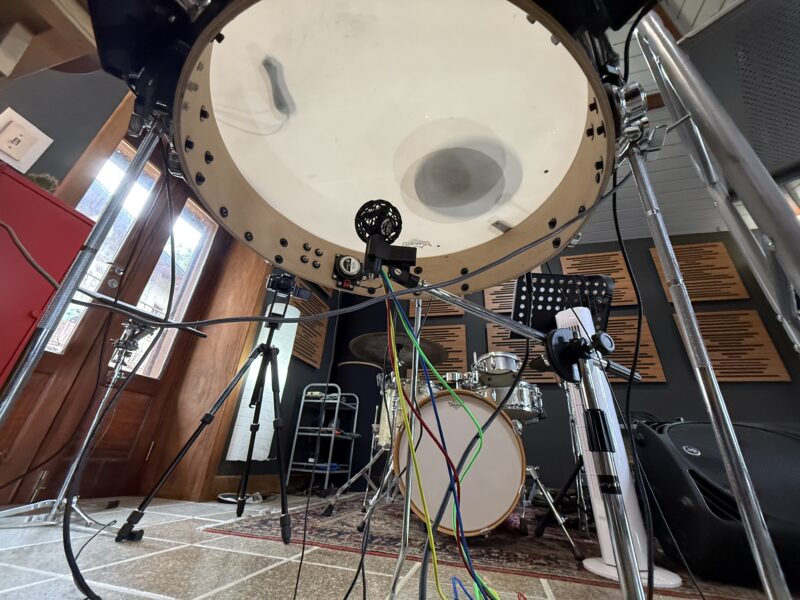
I had known that the gong drum I’ve been using as of late wasn’t as responsive to those kinds of fast modulations, though in principle the idea still works. So I did some testing going back and forth between a snare drum and the gong drum, with various positions and orientation of the ambisonic microphone (next to the drum, close mic’d on the drum, center of the room, etc…) before arriving at having the ambisonic mic under the gong drum. This allowed for more interplay room and head modes, and gave me a lot of “surface area” to orient the virtual microphone while still pointing at the drum head.
This is what the setup looked like for the videos below:

Even with this setup, it’s still difficult to reliably control the ambisonic mic feedback. I can adjust the parameters (mainly rotation, elevation, and polar pattern), and can see on the GUI where the feedback is occurring, but feedback rarely does what you want it to do.
In terms of varying the SoundField parameters dynamically decided to use a Leap Motion 2 (using the amazing ultraleap external) as it was easy to directly map the metaphors of elevation (up/down), rotation (left/right), and polar pattern (hand shape) to the control parameters. I’m generally not a huge fan of using motion controls in this way as the hand being tracked tends to become unavailable for other purposes (word on the street is that the Hyperion engine for the Leap Motion is meant to handle hold “objects” (i.e. sticks/microphones in my case) better but sadly I am unable to install the update to do some kind of license server issue, and no one at Ultraleap is responding to emails…).
In addition to the Leap Motion 2 controller, I also set up a USB expression pedal to adjust the overall gain of the ambisonic mic feedback. This was mainly used for bringing it in and out completely, but it was quite useful for nudging the feedback when both microphone feedback loops were interacting.
Overall the expressivity of the system feels quite high, though I was relying on the GUI to “see” where the feedback is and deciding how I want to move around relative to it. This didn’t always correlate where pointing at the feedback made it jump out, but it did give me some indication of what and where the microphone was hearing.
A surprising aspect of the ambisonic mic audio is that it sounds quite good on its own! Even when it is also part of a wild feedback system. Here is the direct audio from the Ambi-Alice (after decoding and beamforming but before high-pass filter and saturation) followed by the same audio as it appears in the the Ambisonic Feedback 1/4 video:
It could be because I’ve become very used to controlling feedback with a single microphone, but I do find that I am able to shape and control feedback much more quickly with the microphone in my left hand (a Naiant X-X omnidirectional lapel mic), but the feedback control with the ambisonic microphone is more akin to a zoomed out macro control of the feedback system, rather than the immediate changes you get from a microphone physically turning. Then again, it can be something that just takes more experimenting and time with, similar to when I first started exploring using transducers along with microphone feedback (performance video, explanation video). Both of these augmentations (transducers and ambisonic mics) can expand the feedback playing I’ve been doing in powerful and interesting ways, and both require experiments and time to fully maximize what they can offer and how they can be incorporated.
///////////////////////////////////////////////////////////////////////////////////////////////////////////////////////////////////////////////////////////////////////
Musical Performances
For these performance videos I was mainly trying to see what kind of interplay I could get between the Naiant microphone feedback (in my left hand) and the ambisonic mic (under the head), while at the same time trying to have a musical language that I found interesting. After settling on the gong drum as the main instruments, I experimented with some objects and implements that played nicely with the system, and with a few effects just to round things out (mainly distortion, pitch shifting, and stuttering from confetti).
One of the most challenging aspects of these performances was trying to navigate the feedback from the ambisonic mic without relying on looking at the GUI of the plugin so much. Not that looking at the GUI (or orienting the feedback where the GUI was telling me it was) made a massive difference in how the feedback behaved. But having to negotiate a system where movement has an impact on multiple simultaneous chaotic systems makes me feel like I’m exploring the space with a focus on learning it, rather than going with what I find musically relevant or interesting (a musical trope/pet peeve of mine). To a certain extent this is unavoidable with chaotic/feedback systems as there is nothing to say something will happen or behave as you want it to, but familiarity with a system mitigates this for me, and ambisonic feedback is still very new to me.
During this third performance I wanted to primarily explore sustained feedback, and maximize the interplay between the microphones. I still wanted to have some percussive elements to create punctuation and structure, but it was more about finding, tweaking, and tuning the long sustaining feedback sections.
As a final test I brought out my “cymbal mic”, a Zildjian Trashformer with a 3d-printed mount to hold the same microphone I typically use inside the mounting hole of the cymbal. This allows me to get fast cymbal/metal sounds in proximity to the microphone like I can with the Wuhan China cymbal in the previous performance while having more granular control of the microphone and feedback “aperture” when playing the cymbal on the head directly. The wobbly and flexible cymbal lets me easily press and shrink that opening, allowing for changing the feedback tone and timbre in the microphone in a similar way to what I often do by cupping my hand around the microphone.
In general I am quite pleased with these videos, both in terms of their musical content, and their demonstration of what this kind of approach affords. This is also the first time I’ve dragged a musical motif across multiple improvisations/videos in this way (the slow lumbering beat present in 1/4). I think this was a byproduct of the sound world of the setup, and wanting to have something to act as an anchor between sustaining feedback sections.
///////////////////////////////////////////////////////////////////////////////////////////////////////////////////////////////////////////////////////////////////////
The Future
My next steps from here will be to try and map the rotation/elevation/polar as well as gain and phase (something I didn’t experiment with at all yet) parameters in different ways, ideally using descriptor analysis and envelope following. This is much closer to how I often control complex systems, but for the sake of legibility and getting my head around things, I wanted to do something more 1:1 for my initial tests.
I also wonder if I can have something akin to a feedback exterminator where it quickly/dynamically adjusts filters to minimize feedback, but the inverse, where the exposed parameters are quickly adjusted to maximize energy in the system and/or a similar abstracted form of control. A feedback maximizer!
As mentioned above, although I did not experiment with it directly here, I believe messing with the phase (by delaying the audio by tiny durations) of the decoded/processed ambisonic audio I can have a big impact on how the parallel feedback paths interact. There will likely be a point of diminishing returns where too much delay just weakens the feedback altogether, but massaging the phase between the signals is probably a very dynamic vector here.
I was thinking that it would also be interesting to use motion sensors to control the same kind of parameters (rotation/elevation/polar), but rather than using a Leap Motion, I’d have an IMU on my left (microphone) hand to control two microphone positions, one real and one “virtual” (i.e. the ambisonic mic) at the same time. Feedback is a chaotic and fragile system so I always have to play it by ear and feel when moving the microphone around to control and nudge the feedback. So this would just add another dimension to that movement/nudging.
I would also like to incorporate all the processes like decoding and beamforming natively in Max. Thankfully RODE’s SoundField plugin is free, but who is to say that it will work in the future, or on my computer, etc… Not to mention it does not allow me to load the custom calibration files for the Ambi-Alice.
As far as I know, the A to B format decoding is relatively straight forward:
A-format is the four signals from the capsules – left-front/back and right-front/back. To get B-format:
X = 0.5 ((LF – LB) + (RF – RB))
Y = 0.5 ((LF – RB) – (RF – LB))
Z = 0.5 ((LF – LB) + (RB – RF))
W = 0.5 (LF + LB + RF + RB)
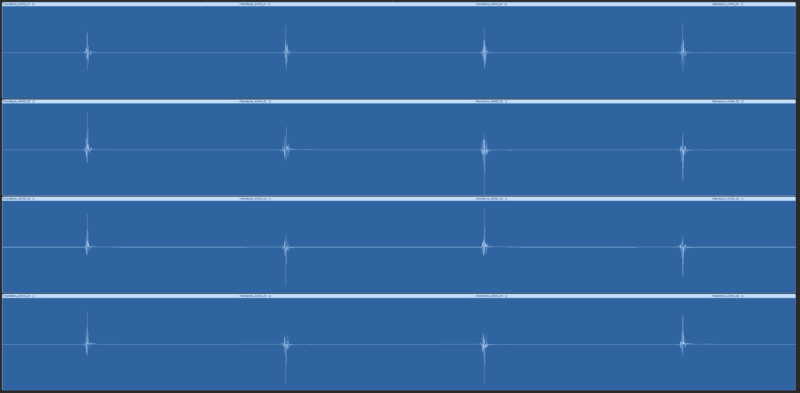
Where this gets more complex is how to incorporate the calibration which appears to be a single 4-channel file, with 4 IRs in series in each channel. The total duration of the file is 3774 samples (for the 44.1k version) , which means each filter is 941 samples long.
Basically looks like this:
I don’t really know enough about ambisonics to do something with this directly.
I’m not against using a Max package/externals to do stuff, though if I can avoid it, it would be nice. The ICST Ambisonics package and specifically the ambiencode~ external looks like it does take “raw coefficients of the signal-matrix”, which I imagine is what I’d want to do here. I could perhaps turn this IR matrix into coefficients using HISSTools or something, but not entirely sure. Also doesn’t inspire confidence that the ICST package hasn’t been updated since 2021, so I’d be wary of building something around it for it to become abandonware.
I would also like to experiment with using transducers and this ambisonic mic approach at the same time. From my previous tests, the transducers were great for injecting more energy into the system, allowing me to play in the same way that I normally would, but with more oomph in the feedback department. I could see that pairing nicely with the ambisonic system, as long as the transducer can be coupled to the same system as the ambisonics mic.
Lastly, given how promising and good this sounds, I’m tempted to get eventually buy a nicer ambisonic microphone. Either a rode NT-SF1, a Core Sound TetraMic, or even a Voyage Audio Spatial Mic, which attracts me due to having ADAT output directly (enabling 2nd order ambisonics without gobbling up most of my preamp channels). Ultimately this is all a gross misuse of ambisonics such that the quality of the microphone itself is probably one of the least relevant aspects of this whole system. I mean, my main feedback microphone (Naiant X-X) is one I chose based on being inexpensive and easy to access rather than its specs or polish/quality. So for now, I will keep experimenting and see where this takes me.
///////////////////////////////////////////////////////////////////////////////////////////////////////////////////////////////////////////////////////////////////////
Some further tests were suggested by good friend (and fellow “doing things the wrong way, right-ly” fan) PA Tremblay where rather than controlling the output of the ambisonic system, treating each microphone capsule independently and route it through a simple processing block where the gain, phase (a delay up to ~50samples), a bandpass frequency, and q were all routed through a neural network in order to allow faster and more direct control of the signal. This would abandon the metaphor of “a microphone pointing in a direction with a specific polar pattern”, but in this kind of use case (feedback), that is of little relevance. This could also be expanded to include some simple compression on each capsule as well.
Another interesting suggestion PA made regarding the feedback maximizer is to use voice allocation (using FluCoMa‘s upcoming fluid.voiceallocator object) to find the loudest peaks in a system and squash them quickly (allowing new ones to emerge quickly) or to simply boost those frequencies, and/or apply some logic in terms of how the voices are birthed/die.
Very cool Rodrigo, I really appreciate the detailed documentation and links to other projects, very informative.
[…] Ambisonic feedback experiments […]